November 29, 2018
DIY Solar Panel: A step-by-step how-to guide
contributor: Engineering for Change University of Edinburgh
Engineering for Change came across the Facebook page of a like-minded organization that happens to share our name, this one based in Edinburgh, UK. The British Engineering for Change is a student-led organization at the University of Edinburgh. The organization was born out of Engineers Without Borders, UK, when the students set out on their own following rule changes at their university that discouraged membership in outside societies. The students now run two local UK-based projects and two international projects.
Abroad, the organization sends engineering students to Cambodia and Romania during summer school breaks. In Cambodia, the students work with a locally based organization called Community First to develop aquaponics systems that complement sustainable farming methods. In Romania, the students work the Romanian charity FAST to provide social assistance to marginalized Roma communities. At home, the students works with their university and with primary schools to lead interactive science and engineering educational activities. Recently, the team developed a plastic recycling machine for the university campus, and led a workshop on building solar panels.
This how-to guide is (the British) Engineering for Change’s contribution to a greater understanding of the basics of solar power.
1. What you’ll need
Note that we have mentioned the costs of some of the unusual items, and prices are in UK pounds.
- Flux pen, bus wire, tabbing wire.
Cost: These can be bought together through VIKOCELL on Amazon. £9.99 for 20m tabbing, 2m bus, 1 pc flux pen. - Solar cells: 12.5 cm x 12.5 cm each. 10 per board.
Cost: £12.99 for 10 cells (VIKOCELL 2.7W Monocrystalline Silicon PV Wafer) on Amazon. - Soldering iron (and enough solder!)
Cost: Any electronic store for around £20. - Glue gun and glue.
- Safety glasses.
- Wooden board, 35 cm x 80 cm.
Cost: Could be free. Try workshops for scraps.
Sand paper if the board needs sanding. - Wire: about 20 cm.
- Voltmeter and LEDs for testing your solar panel.
Cost: LEDs are very cheap, and are available at any electronic store.
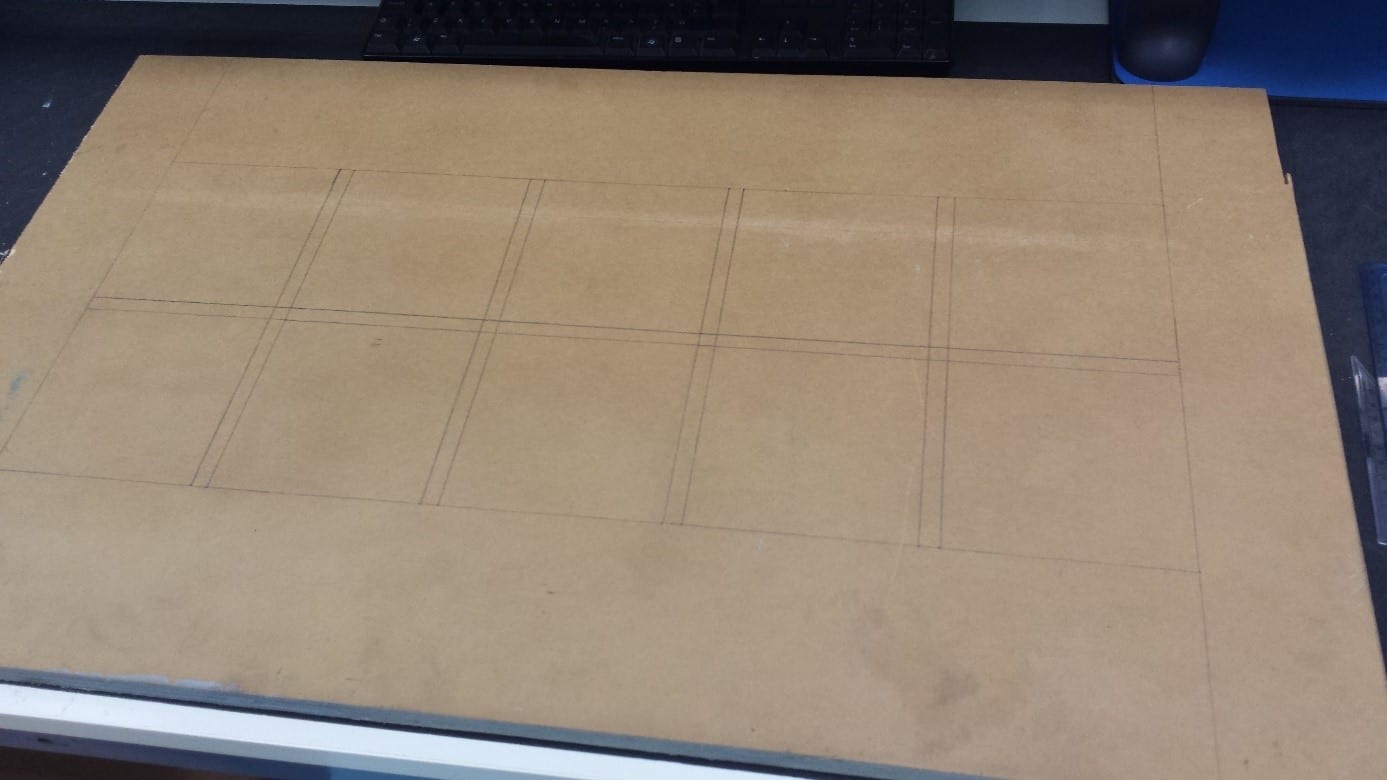
2. Prepare the wood
Remember to sand the sharp edges and rough areas if necessary.
Draw 10 squares (12.5 cm x 12.5 cm) in pencil on the one side of the wood. Leave 1cm space.
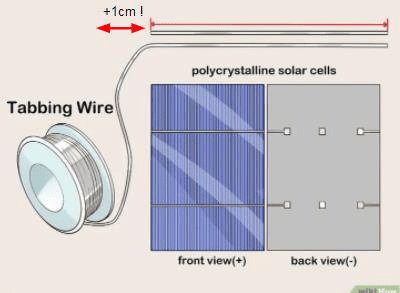
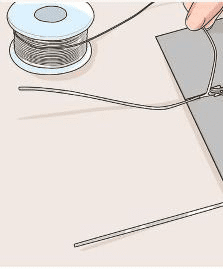
3. Cut the tabbing wire
Cut a length of 26 cm of tabbing wire. That is 2 x 12.5 cm + 1 cm.
4. Solder the cells
We first need to solder the positive side of the cell (the blue side).
4.1. Apply flux pen
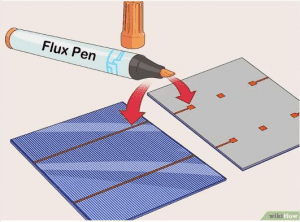
Apply some flux pen before you solder. Only highlight the area you will solder, notated on diagram by the red boxes. Highlight the area 2-3 times.
4.2. Position tabbing wire + hold
Position tabbing wire on the cell you are about to solder.
Keep the tabbing wire still by placing a weight on the wire (but not on the solar cell!)
Place the weight as close to the soldering zone so it is as steady as possible.
4.3. Solder Tabbing wire to cell
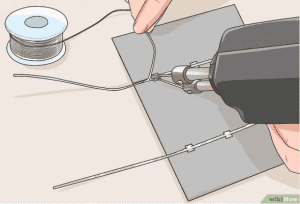
With the soldering iron in one hand, and the solder in another, solder the tabbing wire to the cell.
Don’t put too much pressure and be quick!
Soldering too long on one area will burn the cells, and cause black marks (see picture below).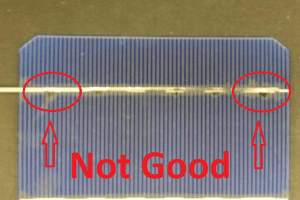
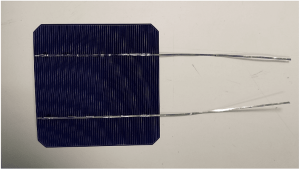
4.4. Solder whole length of cell
Solder the tabbing wire on the whole length of the cell.
Repeat for the second line.
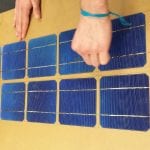
 5. Assemble the cells
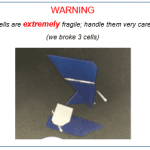
To assemble the cells you are now going to solder the negative part of the cells (the bottom). This section is similar to section 4.
WARNING: This side is even more fragile. Be EXTRA careful.
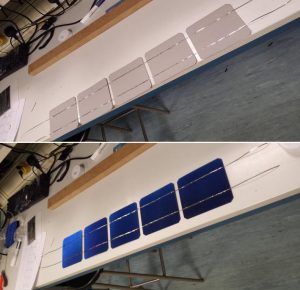
The end product is seen in the images to the left; the top (positive) of each solar panel should be connected to the bottom (negative) of the next.
5.1. Apply flux pen
Apply some flux pen on the 4 stripes (still 2-3 times).
Keep a space of ~1cm between them.
Be careful to assemble the cells in a straight line. Use a wooden stick or other straight edge.
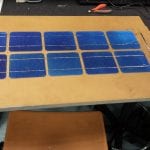
6. Glue the cells
Glue the cells on the wooden board. One person should carefully hold the five cells up while another person applies glue (glue gun) on the board underneath one cell. Do this for each cell.
Make sure to place the positive end of one line beside the negative end of the other line (check with an ammeter).
Be careful with the hot glue gun; unsurprisingly, the glue is hot.
7. Glue the bus wire
Cut two small bus wires (less than length of cell) and one long one (double the cell length).
Glue them at 2-3 cm from the cells. One person applies the glue and the other the bus wire.
Don’t try to remove the glue. If it is unavoidable, be very careful. The glue is attached to the fragile cells. You’ll have to begin all over again if you break one now!
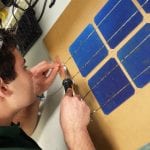
8. Solder the wires
Solder the end of a red wire to the positive beginning and the end of a black wire to the negative end.
The glue will melt because of the heat of the solder; don’t worry about this.
9. Getting your solar panel to work
Now that you have a fully assembled solar panel, you’ll want to get some use out of it!
9.1 Test your solar panel
First test your solar panel. Use a voltmeter to measure the voltage. What’s your voltage? Shine a light over your solar cells to see an increase! We were able to get 3.5 V using a car headlight bulb.
9.2 Applications
The power out of this panel is direct current (DC), and so right now it can only power certain electrical components (we powered LEDs). Even at such a low voltage, if you put both wires close together on your tongue you can feel a small jolt (not painful!).
The power sockets in your house are alternating current (AC). If you want to convert from DC to AC you’ll need a power inverter to convert the power, a charge controller to stabilize it, and a capacitor to store it. These are all fun.
Thanks to Fergus McIlwaine at Engineering for Change – University of Edinburgh for creating this guide.
tags : affordable solar, DIY, how-to guide, SDG7, solar panel


07-01-2019 10:14:11 AM
suchit.das says:
30-11-2018 11:25:19 AM
Rob says: